Adding extra time for a subscription
In some cases we want to add some extra time for a specific client’s subscription, this should usually be done when you want to make up for some lost time due to a lengthy compatibility request.
Locating subscription on WooCommerce
- Go to the Fluid Checkout website dashboard at https://fluidcheckout.com/wp-admin/.
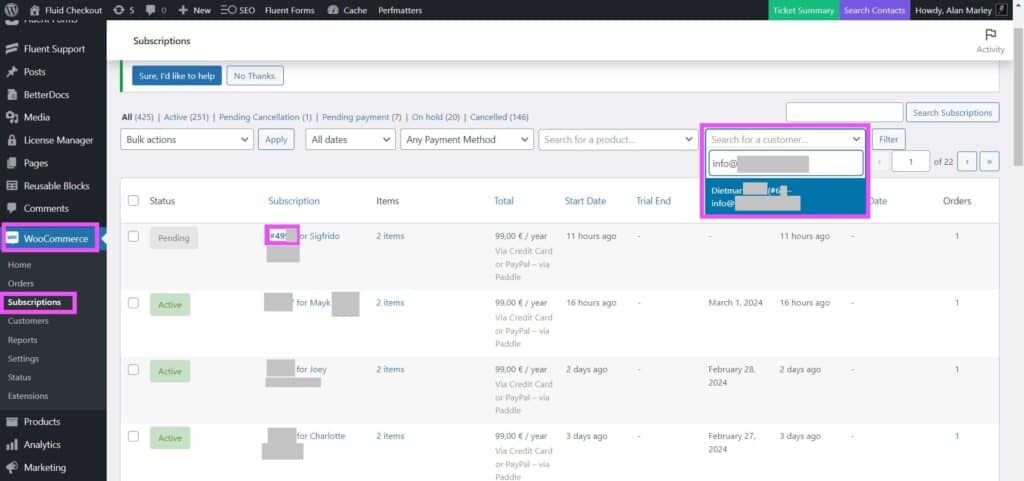
- Go to WP Admin > WooCommerce > Subscriptions.
- Use the “Search for a customer” to find the related subscription using the customer’s email address.
- Click on the subscription #Number.
Locating subscription through the support ticket
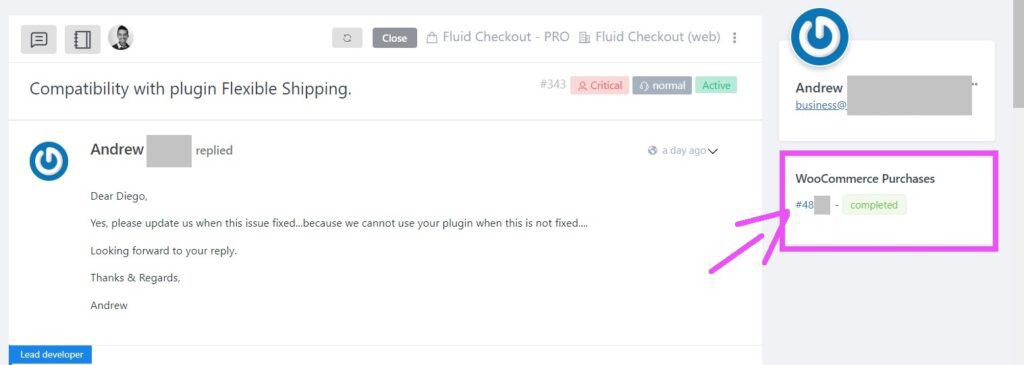
- On the client’s support ticket, locate the section “WooCommerce Purchases”.
- Click on the order number to open the order overview popup.
- Click on the edit button at the left bottom of the order overview popup screen.
- You’ll be redirected to the order details screen, at the bottom of the page find the section “relate orders”.
- Click on the subscription order #number to open the subscription details page.

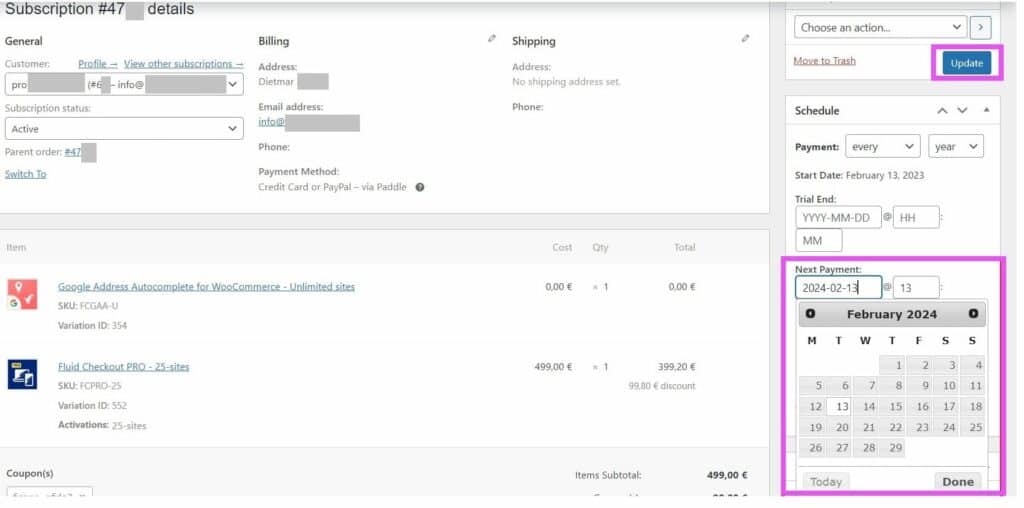
Adding extra time to the subscription on WooCommerce
- On the subscription details screen, find the section “Schedule” on the right part of the screen.
- Locate the field “Next Payment” and change the date to the desired date.
- Save changes by clicking the option “Update” on the “Subscriptions Actions” on the right part of the screen.
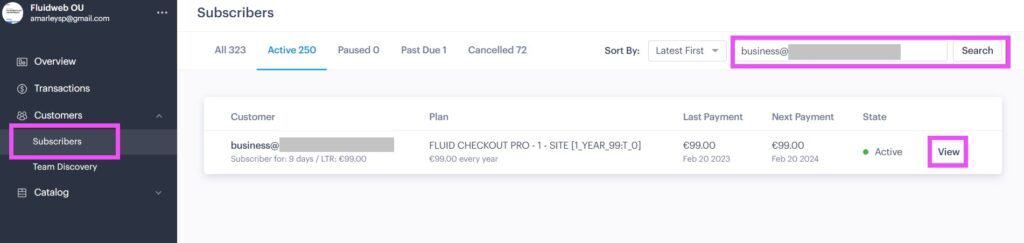
Locating and adding extra time to the subscription on Paddle
- Log into the Paddle dashboard at https://vendors.paddle.com/.
- Go to Menu > Customers > Subscribers.
- Use the search field to find the related subscription using the customer’s email address.
- Choose the option “View” on that subscription.
- Click on “Update billing date”.
- Choose the desired date and click on the option “Set billing date”.

Locating and adding extra time to the License Keys
- Go to the Fluid Checkout website dashboard at https://fluidcheckout.com/wp-admin/.
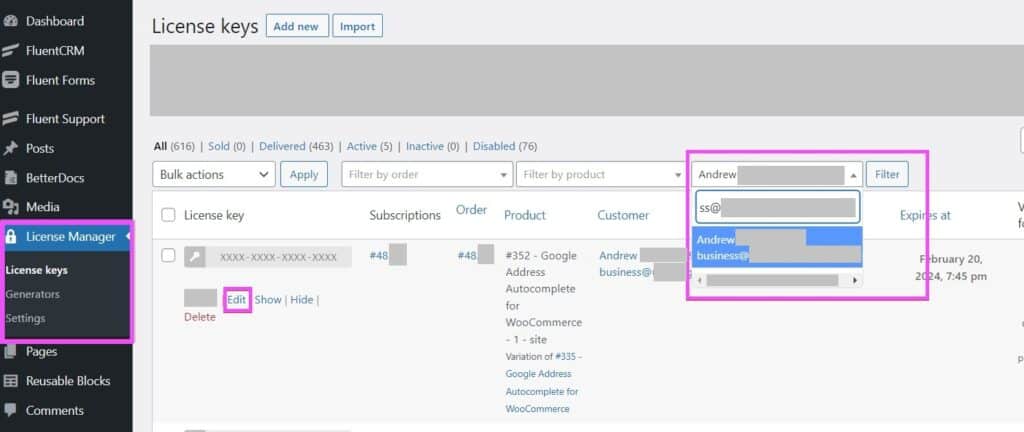
- Go to WP Admin > License Manager > License Keys.
- Use the customer’s email on the field “Filter by user” and click on the option “Filter”.
- Hover the mouse over the license entry and click on the option “Edit”.
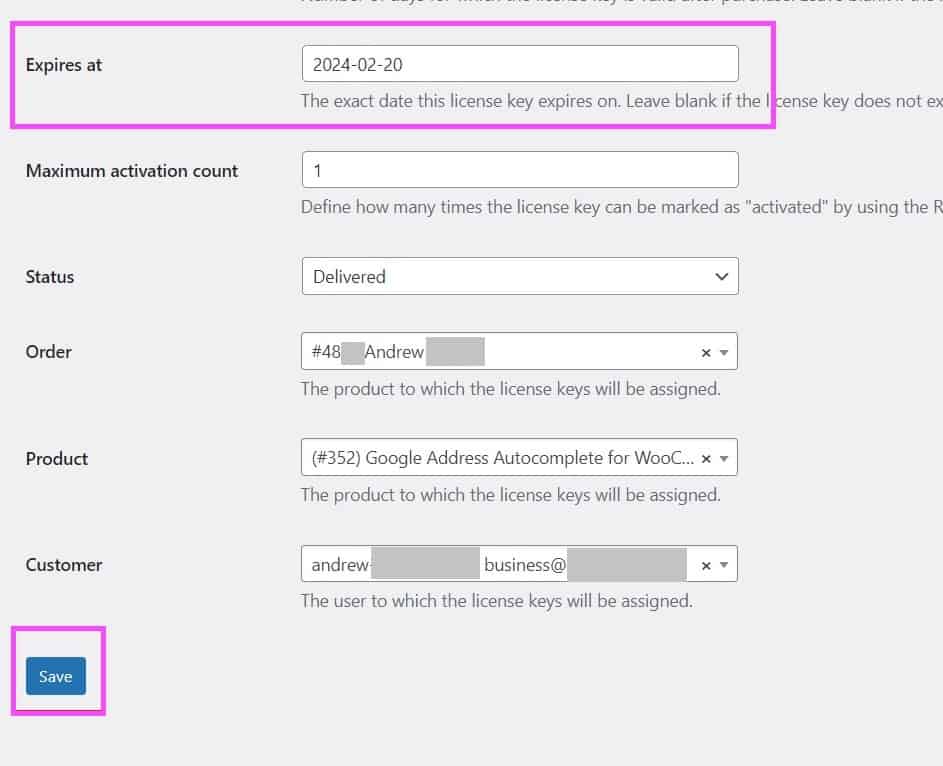
- Locate the field “Expires at” and change it to the desired date.
- Click on the option “Save” at the bottom of the screen.
- Repeat processes 4 to 6 for each license key related to the subscription that was extended.