By default, Fluid Checkout will use the “Multi step” and “2 columns” layout options that show the order summary on a sidebar, which most people are familiar with, and will breakdown the checkout form into easy to fill checkout steps.
With Fluid Checkout PRO, you can choose between “2 columns” layout, or the “1 column” layout without sidebar, and between the “Multi step” and “Single step” layout options. Or you can choose to show the order summary at the top only on mobile devices.
On this page you can find information about the feature:
- Switch to 1 column checkout layout
- Expansible order summary at the top for mobile devices
- Multi step vs Single step checkout layouts
If you are looking for a way to combine the cart and checkout pages, visit our guide:
Switch to 1 column checkout layout #
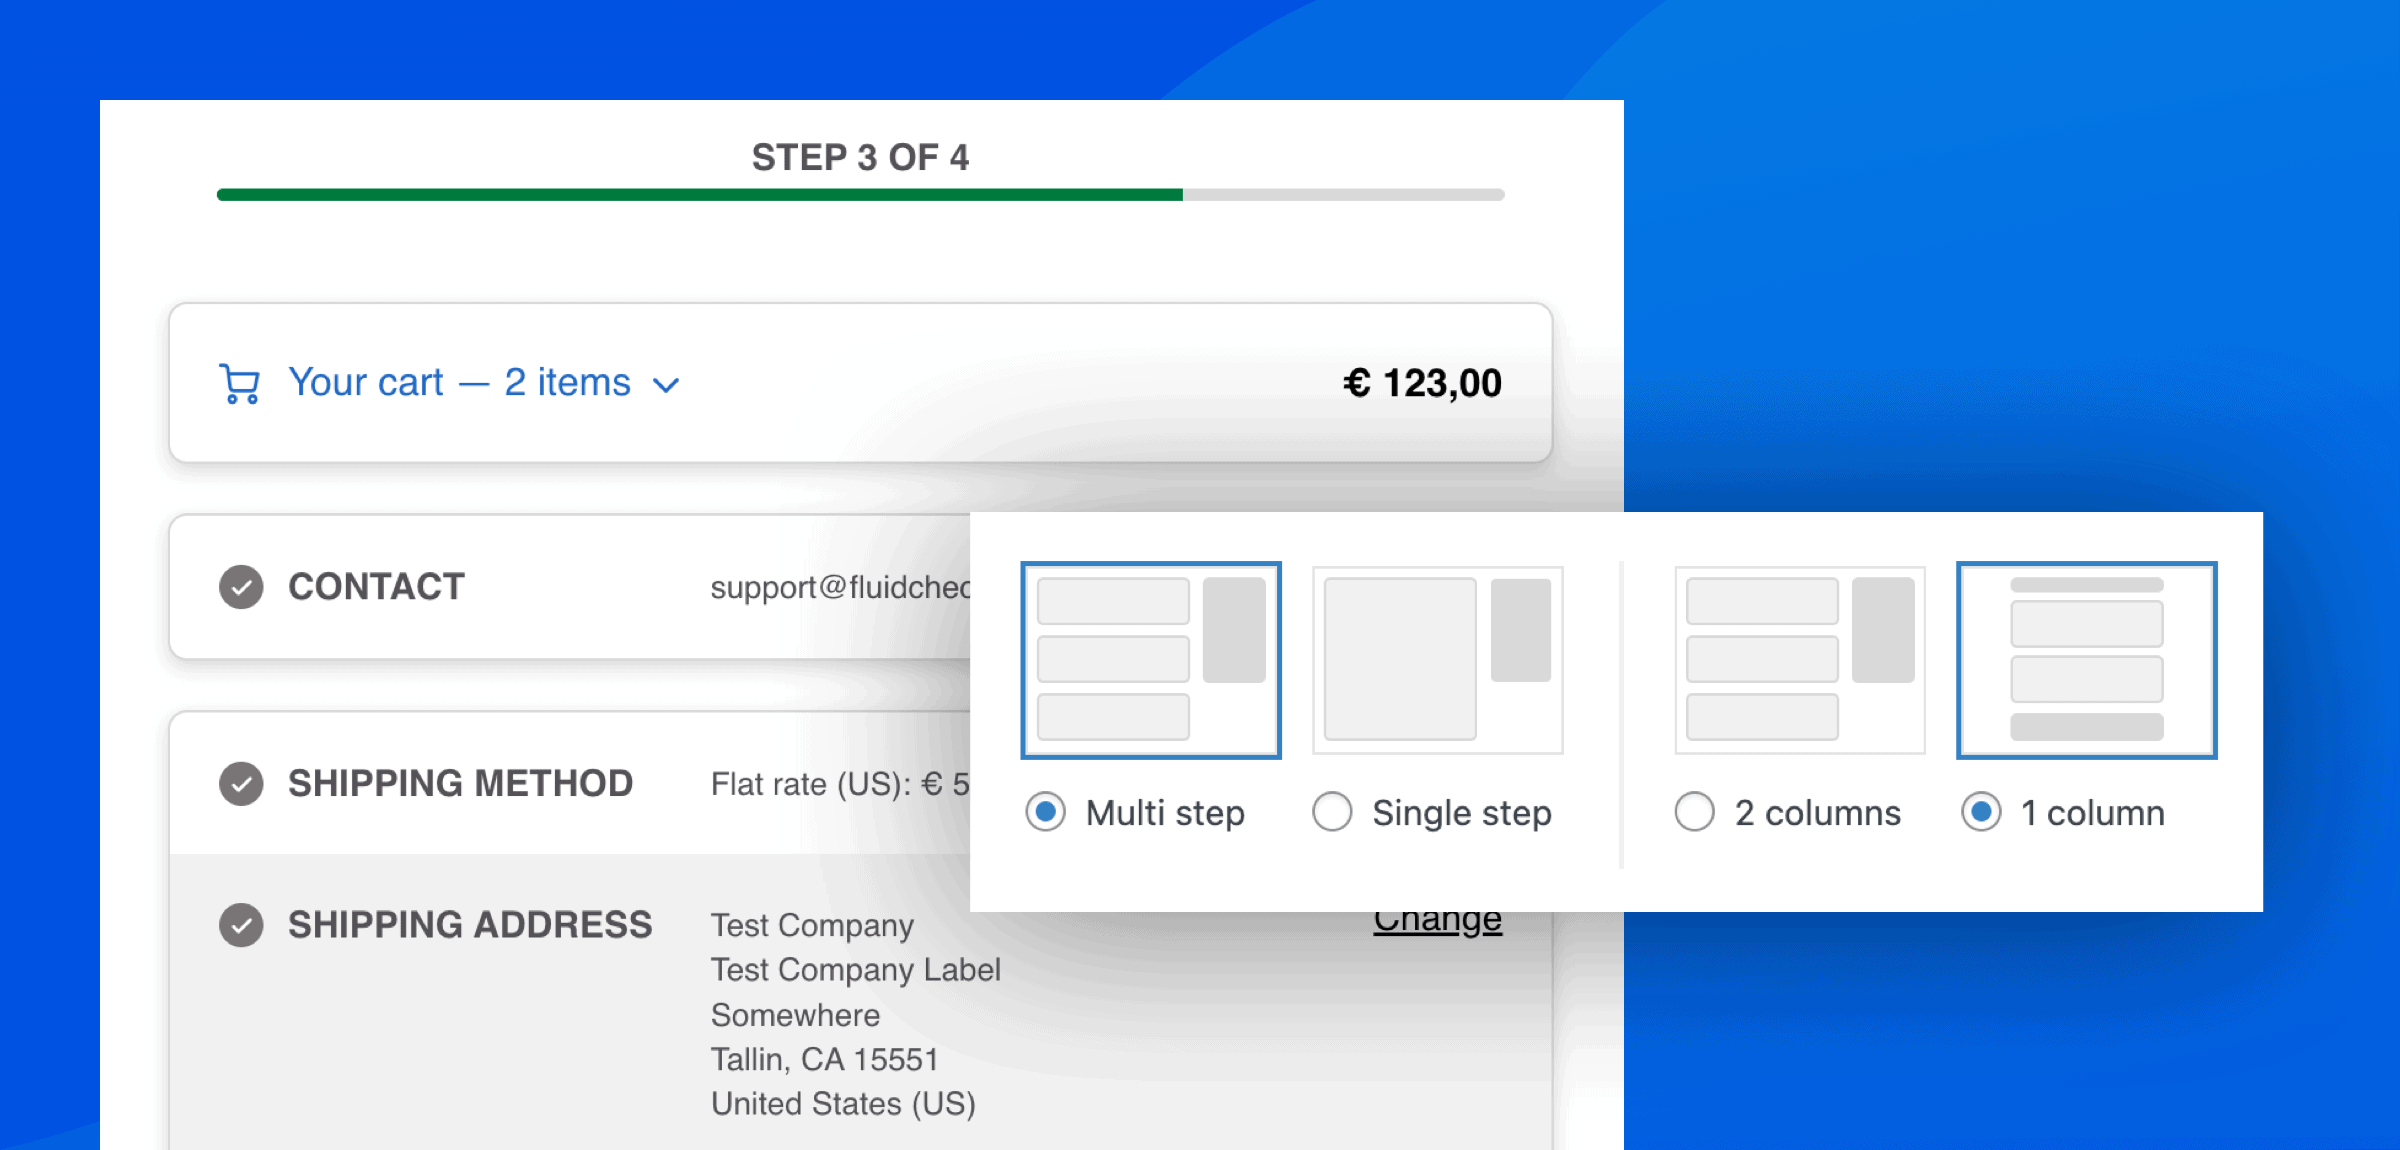
With the 1 column layout, the checkout page will be displayed on a single column without a sidebar, and the order summary will be displayed in two parts:
- An expansible section “Your cart” is displayed at the top, showing the products list, options to edit cart items at checkout, and the totals table;
- The order summary will only display the totals table at the bottom, close the button “Place order”, so the customer can review the order before choosing to complete the payment.
The 1 or 2 columns layout applies to the checkout page, and optimized cart page and order pay page when these features are enabled.
How to enabling the 1 column layout #
- Go to WP Admin > WooCommerce > Settings > Fluid Checkout.
- Navigate to the sub-tab “Checkout”.
- Locate the “Layout & design” section at the top of the page, then locate the “Checkout layout” options.
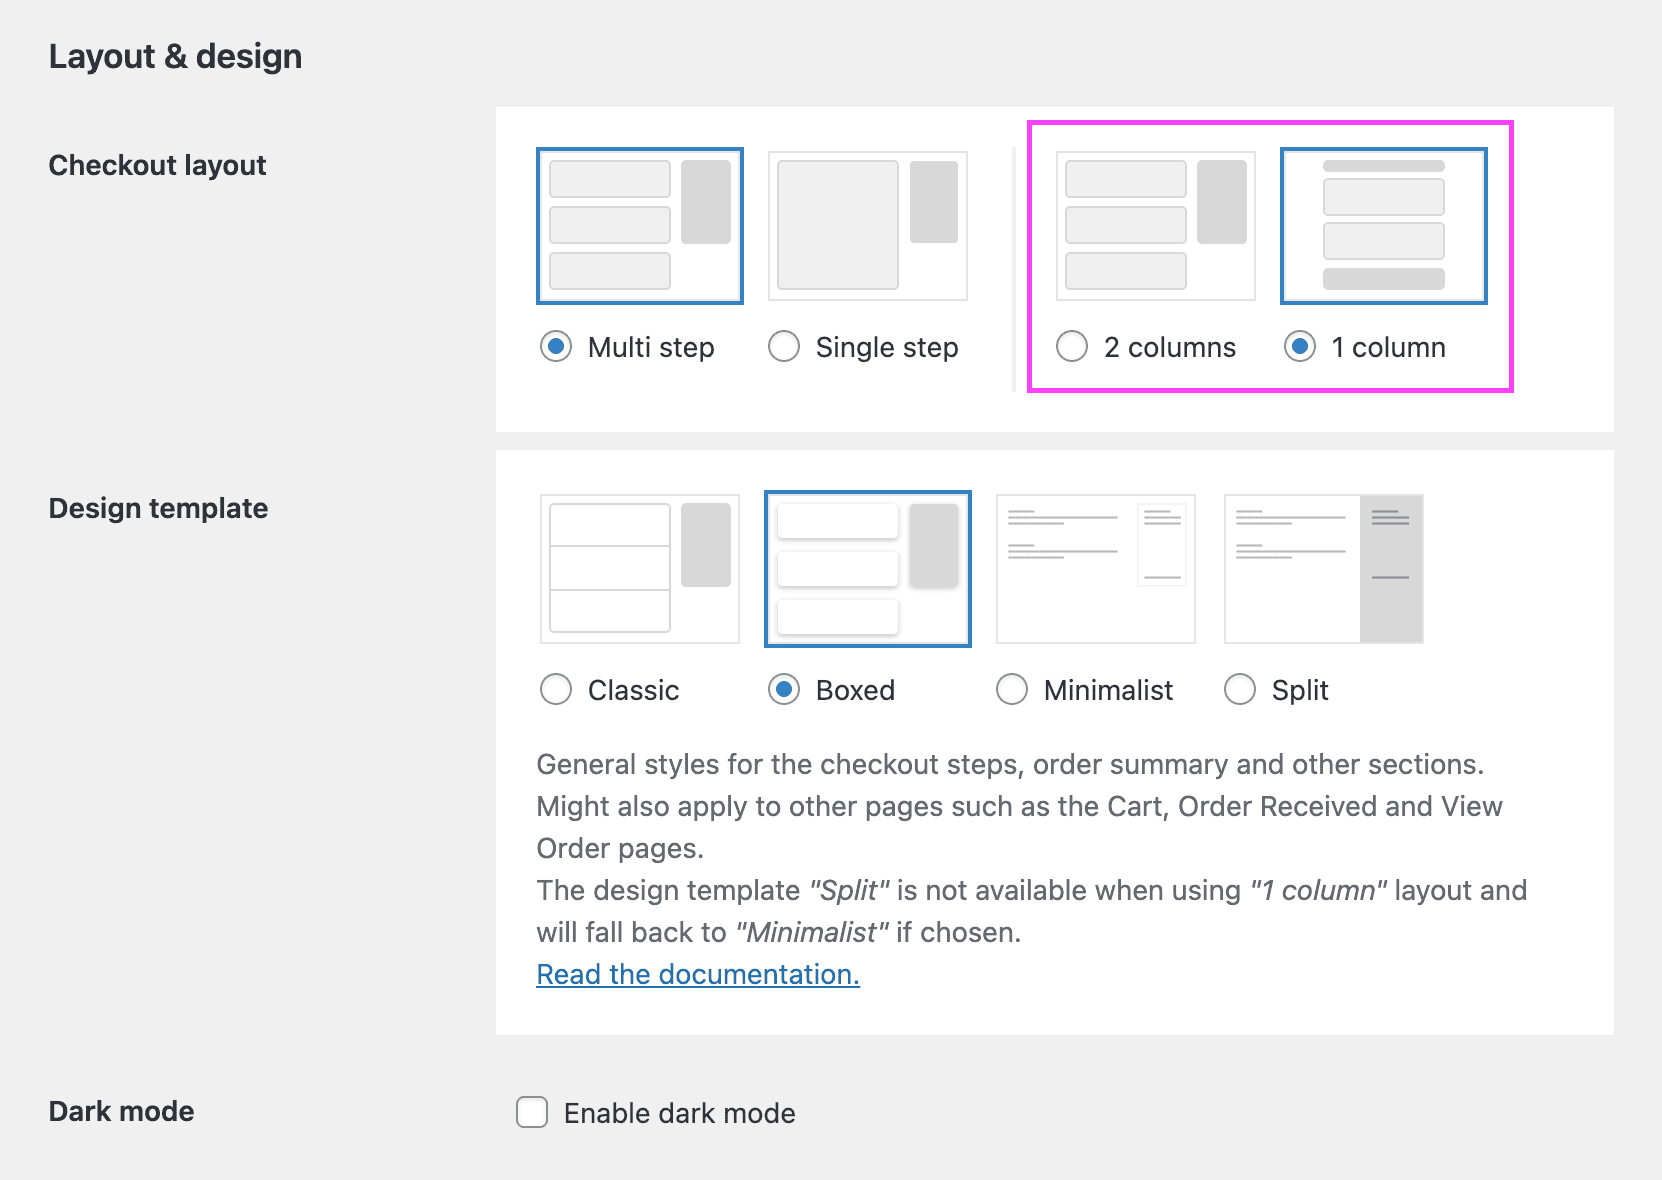
- Choose the “1 column” layout option.
Please note that you will need Fluid Checkout PRO to unlock the 1 column layout option. - Save your changes.
Required options for 1 column layout #
It is worth noting that the “1 column” layout requires that some other options are checked, but they will be automatically changed for you:
- Order summary is always displayed before checkout steps: this options is necessary to display the expansible order summary section at the top before the checkout steps.
- Split design template is not available: the split design only makes sense when using the 2 columns layout, so for this reason when if this design template is chosen together with the 1 column layout, the design template will be automatically changed to “Minimalist”.
Expansible order summary at the top for mobile devices #
The order summary can be displayed at the top of the page before the checkout steps. When this option is enabled, an expansible section “Your cart” will be displayed, showing the quantity of products in your cart and the total amount of the order. Once expanded, the list of products is then displayed with the options to edit cart items at checkout if that feature is enabled, and the order totals table.
If you are using the 1 column layout, this option will be automatically selected and cannot be changed.
It is also possible to show the order summary at the top only for mobile devices when using the 2 columns layout:
- Go to WP Admin > WooCommerce > Settings > Fluid Checkout.
- Navigate to the sub-tab “Checkout”.
- Locate the section “Checkout elements > Order summary”.
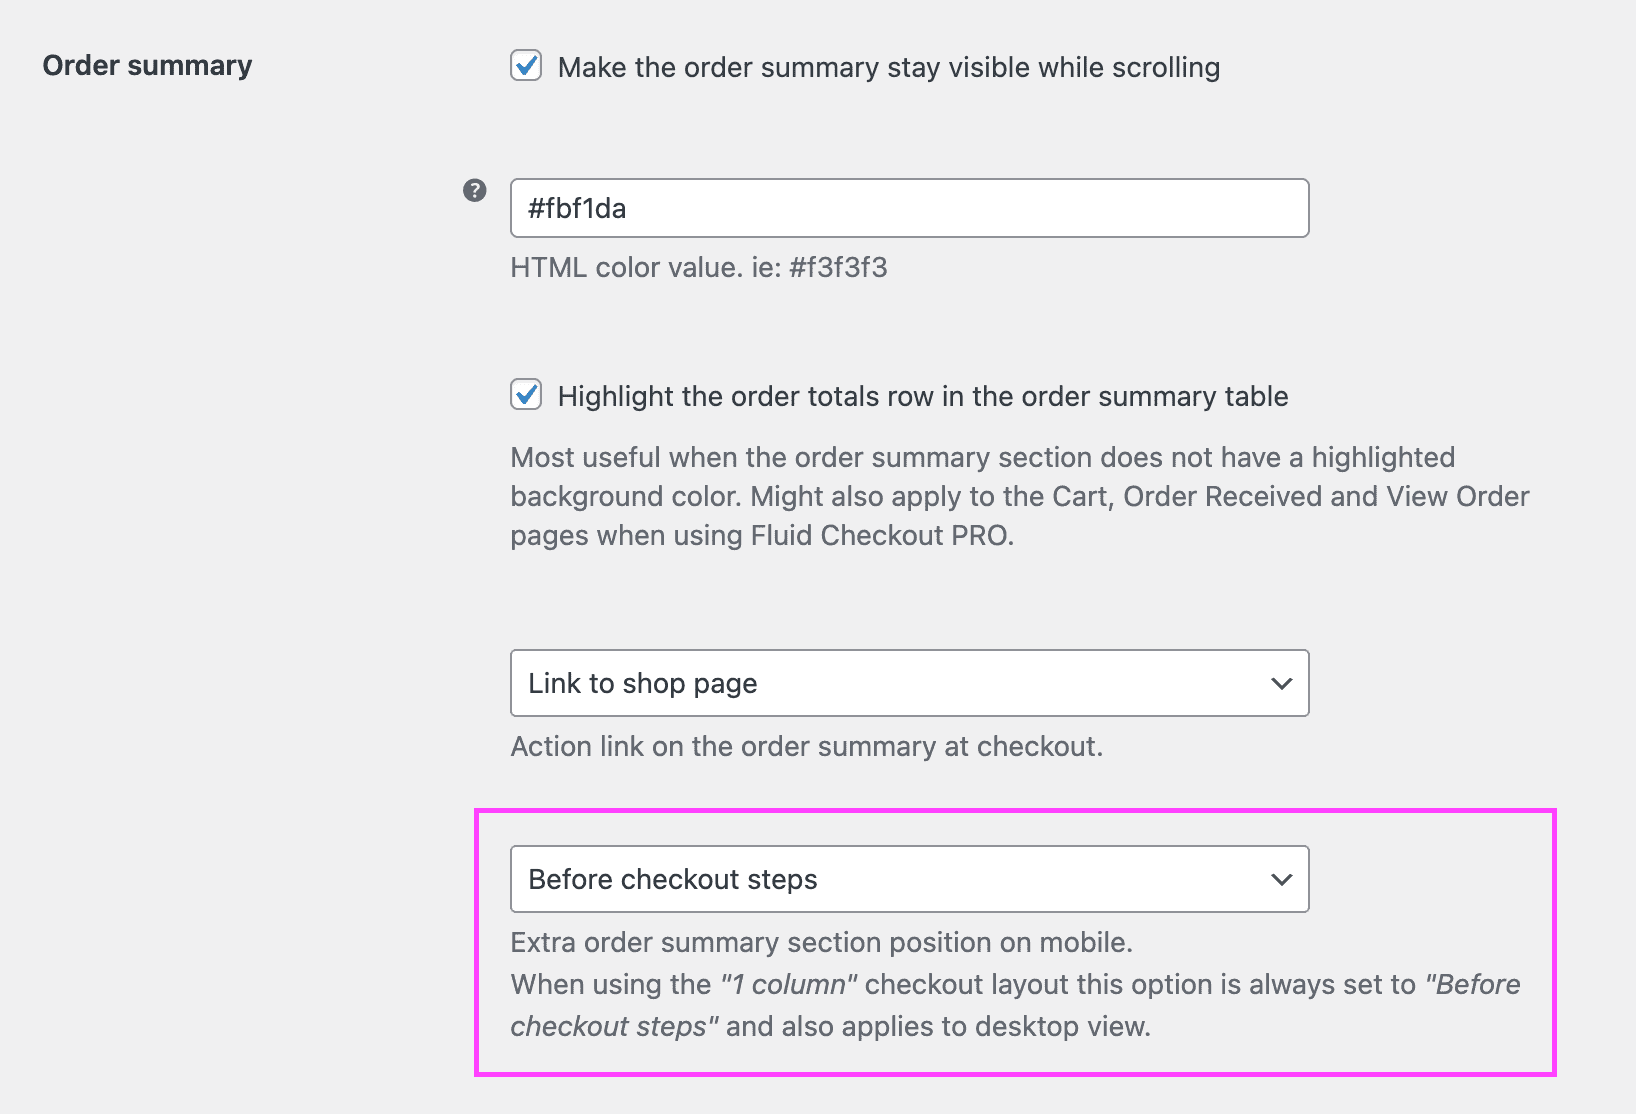
- Choose the option “Before checkout steps” as the position to show the order summary on mobile.
Please note that you will need Fluid Checkout PRO to unlock this option. - Save your changes.
Multi step or Single step checkout layout for WooCommerce #
By default, Fluid Checkout will use the “Multi step” checkout layout and will breakdown the checkout form into 4 easy to fill checkout steps, revealing only the necessary fields for each step. Breaking down the checkout form into steps can reduce the perceived effort customers need to exert to complete purchases online, leading to higher conversion rates, according to findings from the research on checkout optimization by the Baymard Institute.
Yet, for some websites a single step with all the checkout fields displayed at one can have better conversion rates compared to multi step forms, specially when there are very few required fields. The Single step option for Fluid Checkout will show all the checkout steps sections already expanded at the beginning of the checkout process.
Switch between Multi step and Single step checkout layouts #
- Go to WP Admin > WooCommerce > Settings > Fluid Checkout.
- Navigate to the sub-tab “Checkout”.
- Locate the “Layout & design” section at the top of the page, then locate the “Checkout layout” options.
- Choose between “Multi step” and “Single step”.
- Save your changes.