Fluid Checkout replaces the WooCommerce checkout, cart and order received pages with a consistent and better purchase experience, eliminating unnecessary friction at the most critical step of online sales. See all features on our homepage.
This documentation will guide you through the installation and configuration of Fluid Checkout Lite, Fluid Checkout PRO and other Fluid Checkout add-ons.
Installing Fluid Checkout Lite #
Fluid Checkout Lite is the free version of the plugin, offering essential features to enhance the default WooCommerce checkout experience.
Follow the steps below to install and activate Fluid Checkout Lite:
- On your website, go to WP Admin > Plugins > Add New Plugin.
- Search for “Fluid Checkout” in the plugin repository.
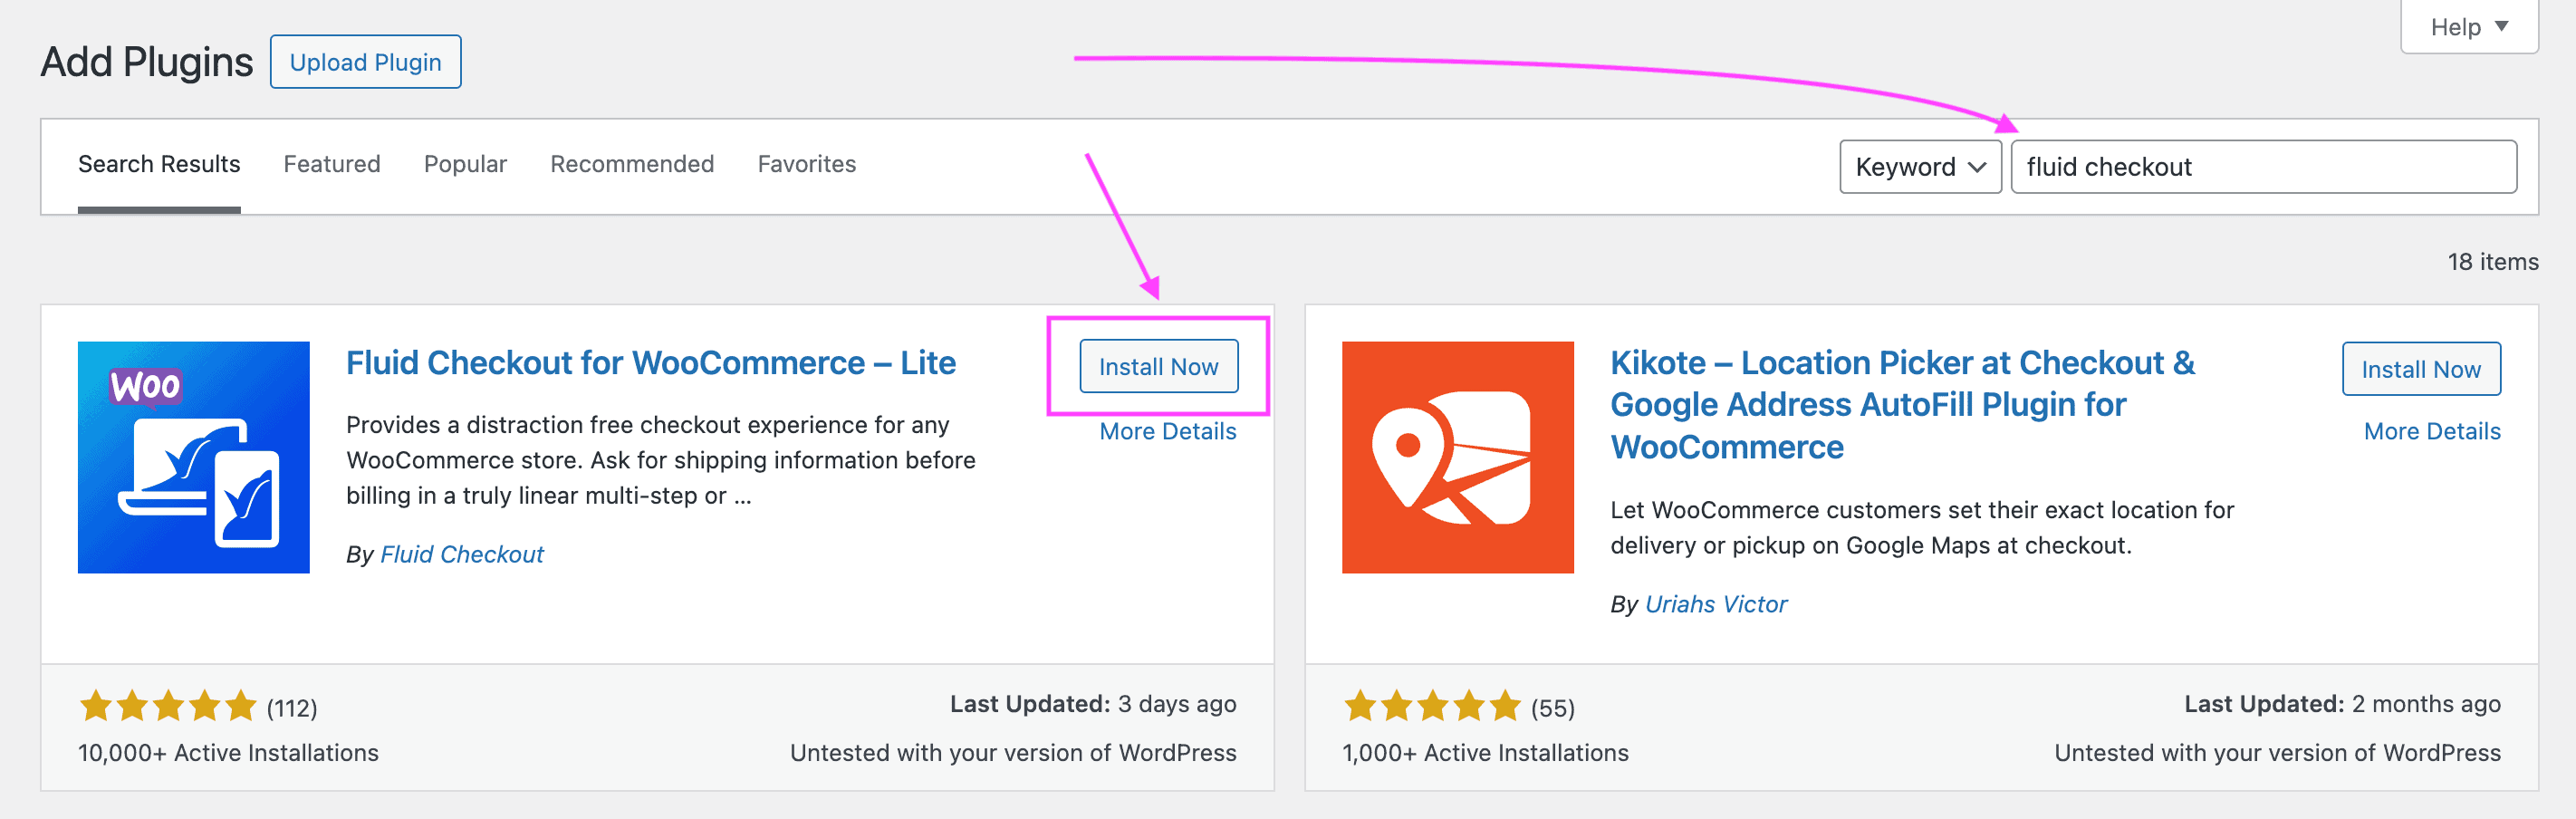
- Click “Install Now” and wait until the plugin is downloaded and installed on your website.
- Then click the button “Activate” to activate the plugin.
- Once activated, go to WP Admin > WooCommerce > Settings > Fluid Checkout.
- Then go to the sub-tab Checkout to configure the checkout form options.
- Click the button “Save changes” at the bottom of the page to save your changes.
Note: At this point your checkout page should be already running on Fluid Checkout. If you do not see any changes to your checkout page after following these steps, you might need to replace the WooCommerce block-based checkout and cart forms with the respective WooCommerce shortcodes on the designated pages on your website.
Manual installation from downloaded zip file #
Alternatively, you can download the latest version of Fluid Checkout Lite from the WordPress.org directory as an installable zip file and manually install it using the plugin upload option on your website admin.
- Go to the plugin page on WordPress.org at https://wordpress.org/plugins/fluid-checkout/
- Then click the “Download” button on the right part of the page.
- If the file is getting extracted and you only see the plugin folder instead of a zip file, you might need to right-click (or click with 2 fingers on some devices) on the download link and choose to save the file as a zip file. You can also check on your computer’s trash folder as the zip file is usually deleted automatically in these cases after being extracted.
- Once the download is completed, go to WP Admin > Plugins > Add new on your website.
- Click the option “Upload plugin” on the top of the page.
- An upload field will appear, click the option “Choose file” or similar and select the zip file you just downloaded.
- Click “Install Now” and wait until the plugin is uploaded and installed on your website.
- Once the upload is completed and the plugin installed, click the link “Activate” at the bottom part of the page to activate the plugin.
- Once activated, go to WP Admin > WooCommerce > Settings > Fluid Checkout.
- Then go to the sub-tab “Checkout” to configure the checkout form options.
- Click the button “Save changes” at the bottom of the page to save your changes.
Note: At this point your checkout page should be already running on Fluid Checkout. If you do not see any changes to your checkout page after following these steps, you might need to replace the WooCommerce block-based checkout and cart forms with the respective WooCommerce shortcodes on the designated pages on your website.
Installing Fluid Checkout PRO #
Fluid Checkout PRO unlocks advanced features and customization options for a more tailored checkout experience as well as expands the optimized purchased experience to other pages as the cart and order received pages.
Do I need to uninstall the free version when upgrading to PRO? #
No. Fluid Checkout Lite is required for Fluid Checkout PRO to work. You will need both plugins installed and activated to use the PRO features.
Installing Fluid Checkout PRO #
Follow these steps to install Fluid Checkout PRO:
- Purchase Fluid Checkout PRO, if you haven’t yet.
- Go to Your account > Downloads on our website.
- Download the installable zip file of Fluid Checkout PRO or another add-on.
- If the file is getting extracted and you only see the plugin folder instead of a zip file, you might need to right-click (or click with 2 fingers on some devices) on the download link and choose to save the file as a zip file. You can also check on your computer’s trash folder as the zip file is usually deleted automatically in these cases after being extracted.
- Once the download is completed, go to WP Admin > Plugins > Add New Plugin on your website.
- Click the option “Upload Plugin” on the top of the page.
- An upload field will appear, click the option “Choose file” or similar and select the zip file you just downloaded.
- Click “Install Now” and wait until the plugin is uploaded and installed on your website.
- Once the upload is completed and the plugin installed, click the link “Activate” at the bottom part of the page to activate the plugin.
- Once activated, go to WP Admin > WooCommerce > Settings > Fluid Checkout.

- Go to the sub-tab “Checkout” to configure the additional checkout form options, and click the button “Save changes” at the bottom of the page to save your changes.
- Go to the sub-tab “Cart” to configure the optimized cart page options, and click the button “Save changes” at the bottom of the page to save your changes.
- Go to the sub-tab “Thank you” to configure the optimized order received (thank you) page options, and click the button “Save changes” at the bottom of the page to save your changes.
- Go to the sub-tab “License keys”, then follow the steps to activate your license keys.
- Test the new features on your checkout page to ensure a smooth experience.
- That is it.
Enabling Fluid Checkout PRO features #
Fluid Checkout PRO unlocks all options in the settings sub-tabs “Checkout”, “Cart” and “Thank you” (order received) in the plugin settings. Most PRO features are turned off by default to avoid forcing unintended changes to your website when the plugin is first installed and activated.
That means you’ll need to go to the plugin settings and manually enable these and other Fluid Checkout PRO features:
- Optimized cart page
- Optimized order received page
- Edit cart contents at checkout
- Account matching
- Gift options
- Local pickup
Follow the steps below to enable Fluid Checkout PRO features:
- Make sure Fluid Checkout PRO is installed and activated.
- Go to WP Admin > WooCommerce > Settings > Fluid Checkout. You’ll find an option to enable the feature along with other settings for each feature in the “checkout”, “cart” and “thank you” settings sub-tabs.
- Go to the sub-tab “Checkout” to configure the additional checkout form options that are now unlocked, and click the button “Save changes” at the bottom of the page to save your changes.
- Go to the sub-tab “Cart” to configure the optimized cart page options, and click the button “Save changes” at the bottom of the page to save your changes.
- Go to the sub-tab “Thank you” to configure the optimized order received (thank you) page options, and click the button “Save changes” at the bottom of the page to save your changes.
- Test the new features on your checkout page to ensure a smooth experience.
- That is it.
Note: If you have enabled the optimized cart page feature in the plugin settings and still do not see any changes to your cart page, you might need to replace the WooCommerce block-based checkout and cart forms with the respective WooCommerce shortcodes on the designated pages on your website.
Installing other Fluid Checkout add-ons #
While Fluid Checkout PRO unlocks advanced features and customization options for a more tailored checkout experience, we also offer various add-ons to add specialized features to your checkout process and make it even more conversion optimized.
Follow these steps to install Fluid Checkout PRO:
- Purchase one or more Fluid Checkout add-ons on our website, if you haven’t yet.
- Go to Your account > Downloads on our website.
- Download the installable zip file of the add-on you are installing now.
- If the file is getting extracted and you only see the plugin folder instead of a zip file, you might need to right-click (or click with 2 fingers on some devices) on the download link and choose to save the file as a zip file. You can also check on your computer’s trash folder as the zip file is usually deleted automatically in these cases after being extracted.
- Once the download is completed, go to WP Admin > Plugins > Add New Plugin on your website.
- Click the option “Upload Plugin” on the top of the page.
- An upload field will appear, click the option “Choose file” or similar and select the zip file you just downloaded.
- Click “Install Now” and wait until the plugin is uploaded and installed on your website.
- Once the upload is completed and the plugin installed, click the link “Activate” at the bottom part of the page to activate the plugin.
- Once activated, go to WP Admin > WooCommerce > Settings > Fluid Checkout.

- Locate and click the sub-tab respective to the add-on you have just activated.
- Depending on each add-on, its features might already be enabled by default and for others you might need to manually enable each feature.
- Make the necessary changes to the add-on settings, and click the button “Save changes” at the bottom of the page to save your changes.
- Go to the sub-tab “License keys”, then follow the steps to activate your license keys.
- Test the new features on your checkout page to ensure a smooth experience.
- That is it.
License key activation #
After installing Fluid Checkout PRO or any other add-on, you need to activate your license key to receive automatic updates and support.
Follow the steps below to activate your license key for Fluid Checkout PRO and other add-ons:
- Go to WP Admin > WooCommerce > Settings > Fluid Checkout > License keys.
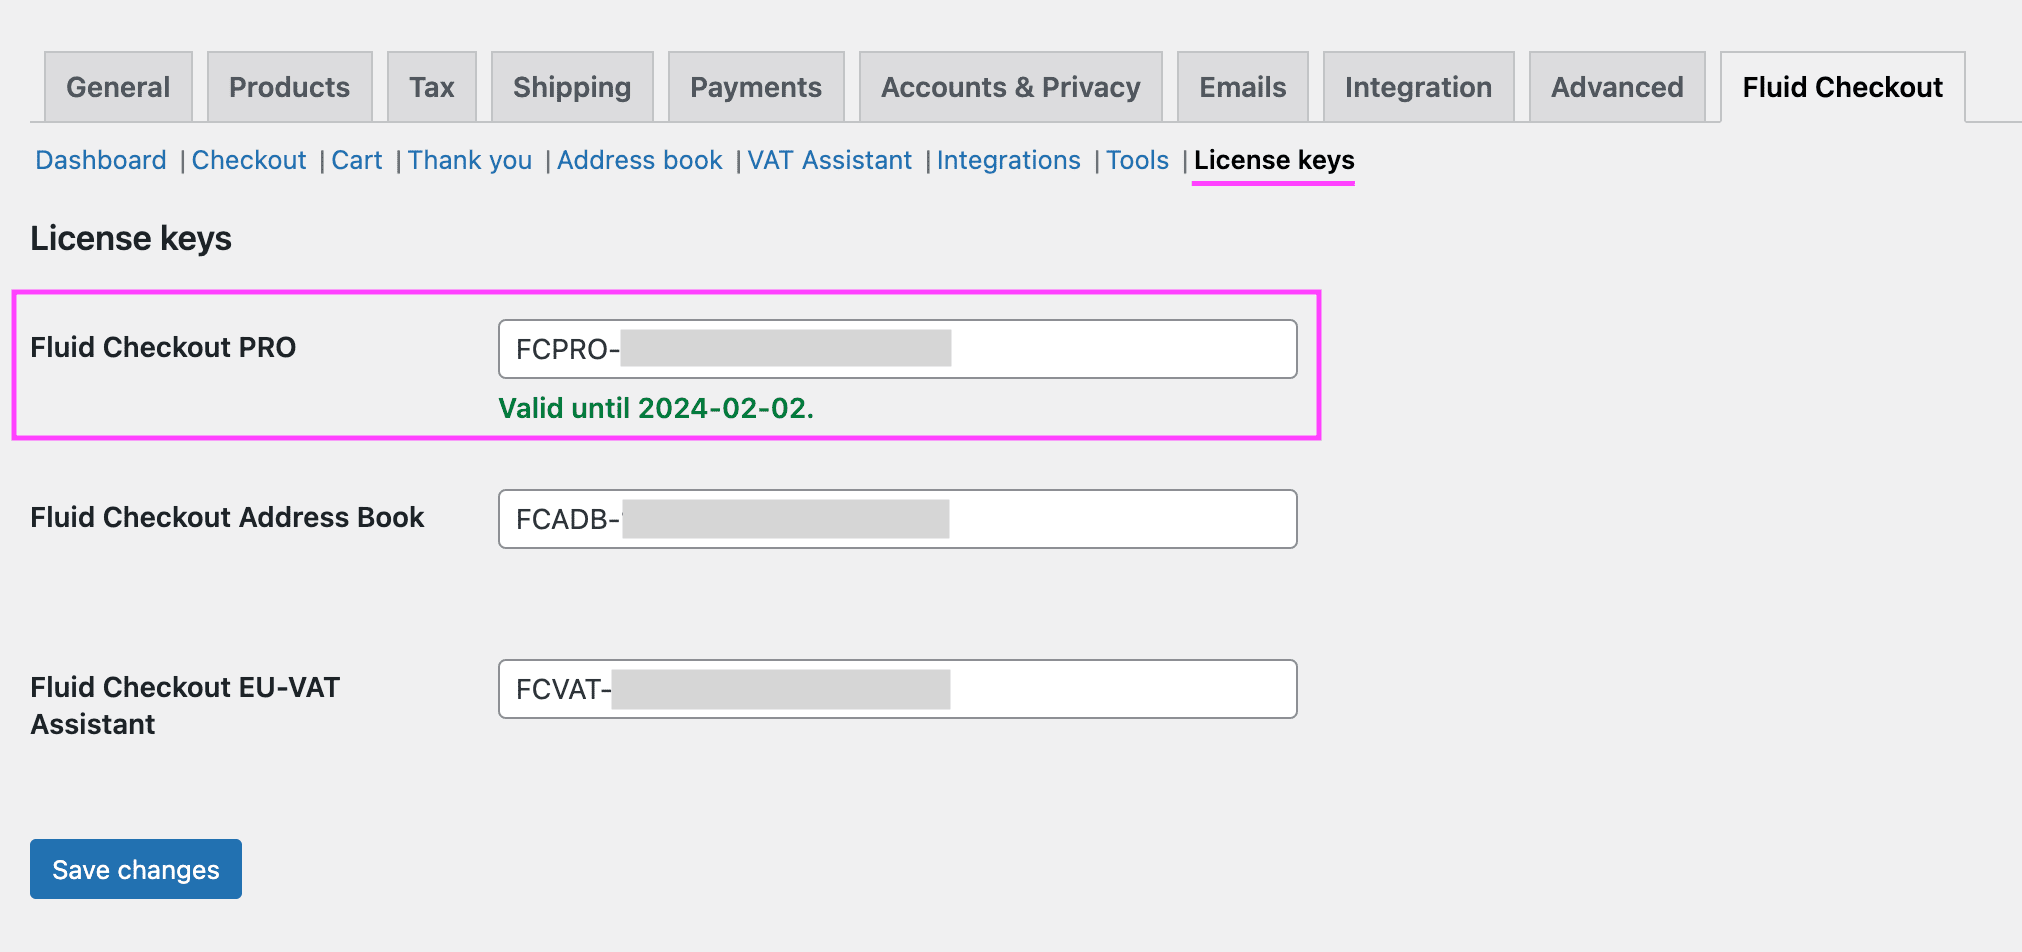
- Locate the license key field related to Fluid Checkout PRO and the add-ons you want to activate the license keys for.
- Type your license key into the respective license key field for Fluid Checkout PRO and each add-on.
- Click the button “Save changes” at the bottom of the page to save your changes and activate your license key.
If you have any issues activating your license key, please contact our support.