Fluid Checkout plugins and add-ons are 100% translatable #
We make all our plugins fully localized and translatable. All labels and other texts added or changed by the plugin are translatable using the built-in WordPress functions. This is very important for all users worldwide.
While this article shows how to translate Fluid Checkout into your language, this article applies to all our plugins and also 3rd-party themes and plugins that also make use of the WordPress translation functions.
Automatic translations for most used languages #
Fluid Checkout plugins and add-ons are fully localized and translatable using the built-in WordPress functions, and currently translated into 83 languages out of the 132 languages supported by WordPress, which should include all the most used languages.
All translations are done automatically through DeepL or Google Translate as available on those services. Some translations errors are expected to happen. Please contact our support and we will evaluate and fix these errors.
Languages translated #
Below are the languages that are automatically translated and included with every Fluid Checkout plugin or add-on. The only exception being the add-on EU-VAT Assistant, which only contains translations for the languages spoken in the EU countries.
| Language Code | Language name (in English) |
|---|---|
| af | Afrikaans |
| am | Amharic |
| ar | Arabic |
| as | Assamese |
| az | Azerbaijani |
| bel | Belarusian |
| bg_BG | Bulgarian |
| bn_BD | Bengali (Bangladesh) |
| bs_BA | Bosnian |
| ca | Catalan |
| ceb | Cebuano |
| ckb | Kurdish (Sorani) |
| cs_CZ | Czech |
| cy | Welsh |
| da_DK | Danish |
| de_DE_formal | German (Formal) |
| el | Greek |
| eo | Esperanto |
| es_ES | Spanish (Spain) |
| et | Estonian |
| eu | Basque |
| fa_IR | Persian (Iran) |
| fi | Finnish |
| fr_FR | French (France) |
| fy | Frisian |
| gd | Scottish Gaelic |
| gl_ES | Galician |
| gu | Gujarati |
| he_IL | Hebrew |
| hi_IN | Hindi |
| hr | Croatian |
| hu_HU | Hungarian |
| hy | Armenian |
| id_ID | Indonesian |
| is_IS | Icelandic |
| it_IT | Italian |
| ja | Japanese |
| jv_ID | Javanese |
| ka_GE | Georgian |
| kk | Kazakh |
| km | Khmer |
| kn | Kannada |
| ko_KR | Korean |
| kir | Kyrgyz |
| lo | Lao |
| lt_LT | Lithuanian |
| lv | Latvian |
| mk_MK | Macedonian |
| ml_IN | Malayalam |
| mn | Mongolian |
| mr | Marathi |
| ms_MY | Malay |
| my_MM | Myanmar (Burmese) |
| nb_NO | Norwegian (Bokmål) |
| ne_NP | Nepali |
| nl_NL | Dutch |
| pa_IN | Punjabi (India) |
| ps | Pashto |
| pl_PL | Polish |
| pt_BR | Portuguese (Brazil) |
| pt_PT | Portuguese (Portugal) |
| ro_RO | Romanian |
| ru_RU | Russian |
| si_LK | Sinhala |
| sk_SK | Slovak |
| sl_SI | Slovenian |
| snd | Sindhi |
| sq | Albanian |
| sr_RS | Serbian |
| sv_SE | Swedish |
| sw | Swahili |
| ta_IN | Tamil (India) |
| te | Telugu |
| th | Thai |
| tl | Tagalog |
| tr_TR | Turkish |
| ug_CN | Uighur |
| uk | Ukrainian |
| ur | Urdu |
| uz_UZ | Uzbek |
| vi | Vietnamese |
| zh_CN | Chinese (Simplified, China) |
| zh_TW | Chinese (Traditional, Taiwan) |
One translation file for each separate plugin or add-on #
Please note that each of our plugins have their own translation files, so if you are using more than Fluid Checkout Lite on your website and want to translate everything into your language, you’ll need to repeat the process shown in the section “Translating plugins with Loco Translate” below for each of those plugins.
For instance, Fluid Checkout Lite and Fluid Checkout PRO are two separate plugins, so you’ll need to edit translations for each plugin separately. This is also the case for each separate add-on plugin we sell.
Sometimes we also use text that comes from WooCommerce itself, in which case you might need to edit the WooCommerce translations to customize them.
At the time of writing this, we offer the following plugins, which will need to be translated separately:
- Fluid Checkout Lite (free version)
- Fluid Checkout PRO
- Google Address Autocomplete add-on
- Address Book add-on
- EU-VAT Assistant add-on
Translating plugins with Loco Translate #
We recommend using the plugin Loco Translate to translate Fluid Checkout into your own language as it is easy to use and allows you to save your translations to a safe place. However, you can use any translation plugins available to WordPress, or any PO file editor.
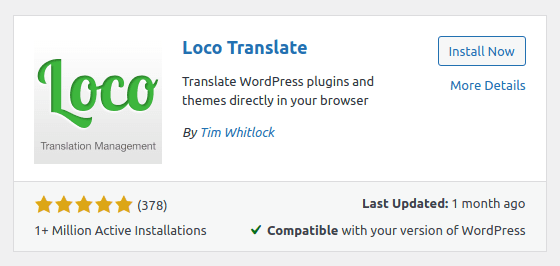
1. Install and activate the Loco Translate plugin
Go to WP Admin > Plugins > Add new, and search for “Loco Translate”. Or download the plugin file from the link below and upload it to your website:
https://wordpress.org/plugins/loco-translate/
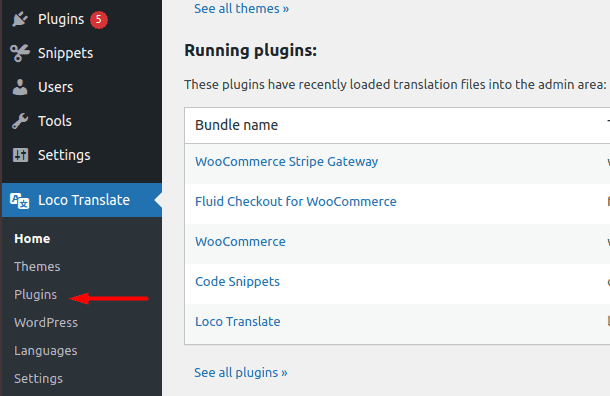
2. Go to WP Admin > Loco Translate. It will show a list of all plugins and themes you can translate using Loco Translate.
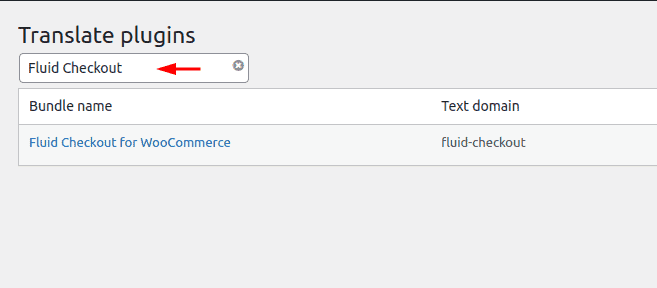
3. Type the name of the plugin or theme you want to translate inside the search field, in this case, “Fluid Checkout”:
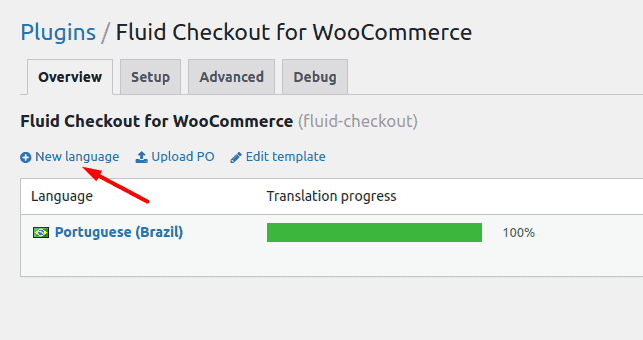
4. Click on the option “New Language”:
5. Next, select your language, set the location to save the translation files either to the “custom” or the “system” translations folder locations. Then click the option “Start translating”.
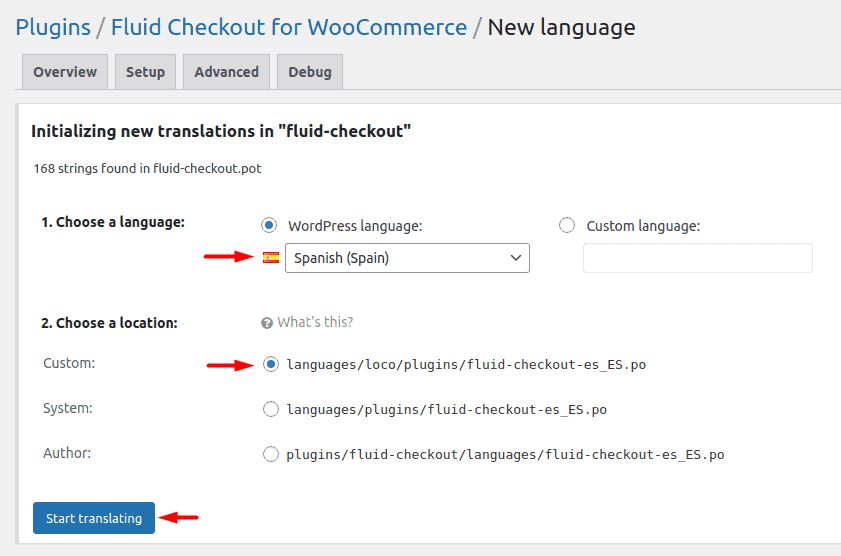
We recommend you select the “custom” and keep the Loco translate plugin active after you finish translating. This will ensure your translation files won’t be deleted or overwritten with future Fluid Checkout updates or with translations from the WordPress directory.
If you choose to save the new translation file to the “system” folder, you won’t need to keep the Loco Translate plugin active, however, if a translation of the plugin to your language is added to the WordPress directory in the future, your translations might get overwritten.
See more information about these settings from the Loco Translate in the article below:
https://localise.biz/wordpress/plugin/faqs/files-deleted
6. Translate each word or phrase of the plugin into your language. If you do not provide a translation for a certain text, the default value in English will be used.
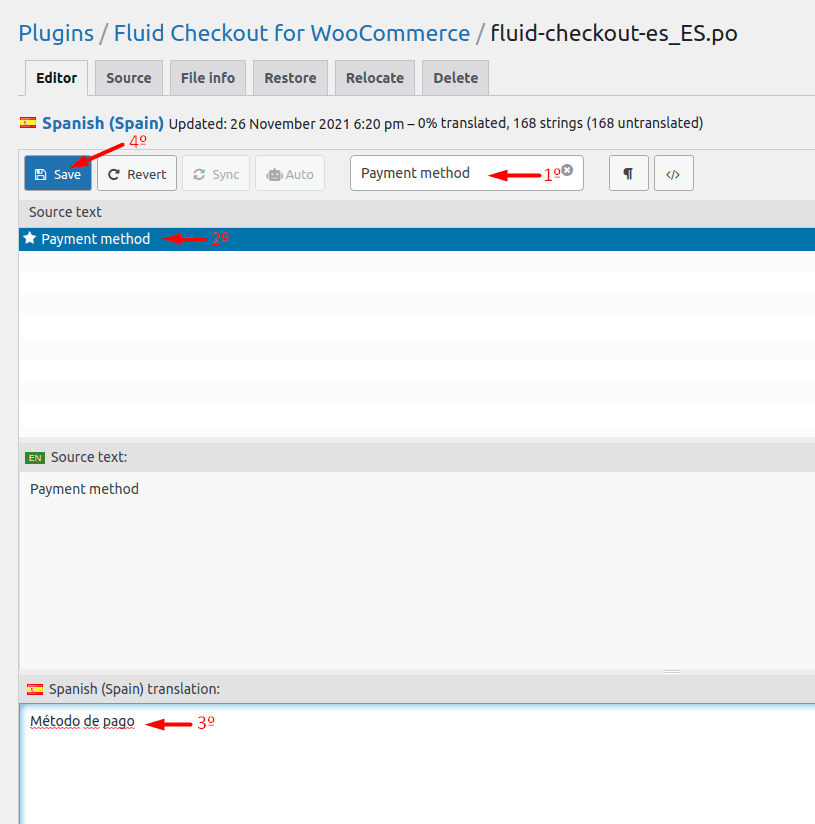
6.1. Use the search option to find the “Source text” you want to translate.
6.2. Select the text you want to translate by clicking on it.
6.3. Add the translation to your language at the box below the “Source text”.
6.4. Save the translation. You can translate multiple texts and save them all at once, however, we recommend saving as often as possible.
6.5. Do these same steps for each text you want to translate.
Activating the translations on your website (changing site language) #
Once the translation files are saved, you should already see the plugin in your own language on the website.
The next steps are only necessary if you want to change the default language for your website, and might not be necessary for websites with multiple languages enabled (ie. when using Polylang or WPML plugins).
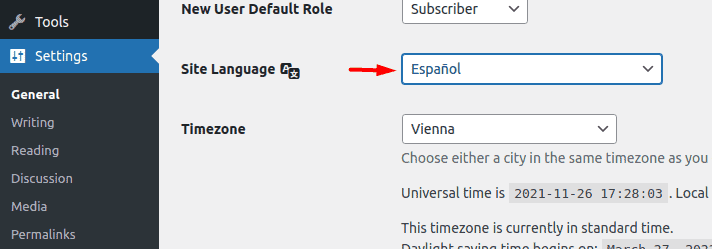
1. Change the default language of your website at WP Admin > Settings > General, then change the “Site Language” to your language.
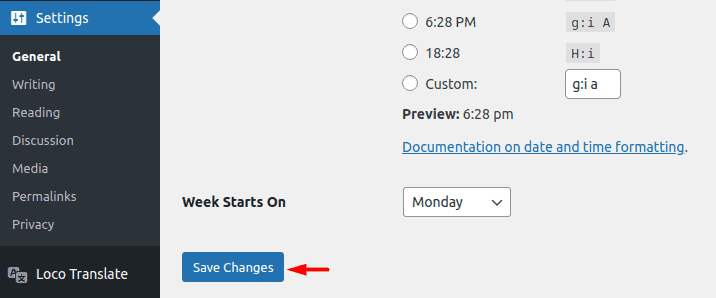
2. Save the Changes.
Please note that after a new version of Fluid Checkout is available, you might need to hit “Sync” button when editing the translation to your language to update the existing original text available for translation.
Why cannot I find and translate some words or phrases? #
Some words, terms, strings and phrases used by Fluid Checkout are originated from other plugins or WooCommerce itself.
To translate these words and phrases into your language, you will need to change the translation files of the plugin where that term was originated from.
If you cannot find a term or phrase in the Fluid Checkout language files to translation into your language, check whether that term can be found and translated by modifying it in the WooCommerce translation files (text domain woocommerce).
