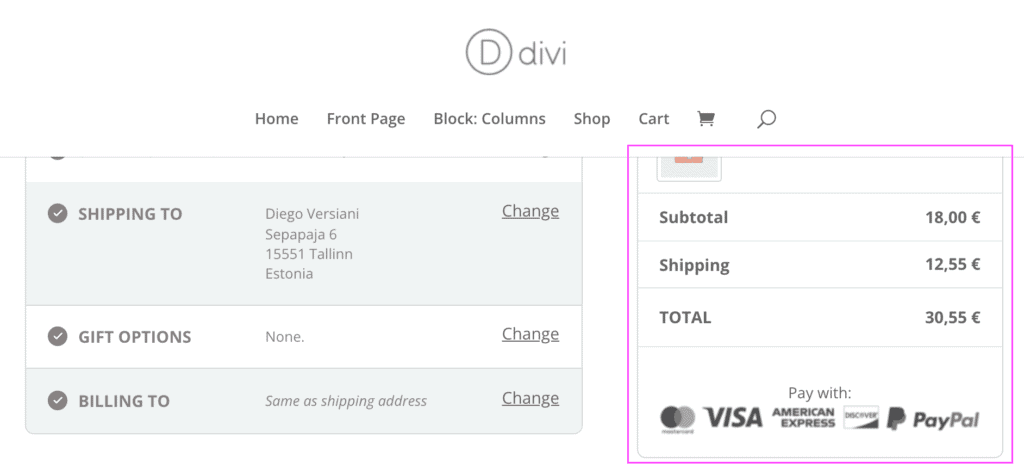
Order summary and progress bar is being cut off by the header #
Usually the site’s header will only cut off the order summary and progress bar when the original theme’s header is being used.
By default, Fluid Checkout will replace the checkout page header with a simplified version and this issue would not happen. If you are experiencing this issue on your website, you are probably using your theme’s header on the checkout page.

We recommend using the default checkout page header provided by Fluid Checkout as it is optimized for conversions and is also required to display the mobile cart button which gives the customers access to the total order amount and the popup order summary section on mobile devices.

Although, there are some cases which using the theme’s header and footer at the checkout can be beneficial.
For the cart page, if you are using the Cart Optimization feature from the Fluid Checkout PRO plugin, the default option is to use the theme’s header instead of the cart page header provided by Fluid Checkout PRO.
Why does the order summary and progress bar get cut off? #
The order summary and progress bar rely on the existence of the checkout header element provided by Fluid Checkout to define the position where it should be positioned fixed, following the user while scrolling, and when the element should scroll with the page out of the user’s immediate view.
Since each theme might use a different ID for the site header, and they differ a lot, it is not possible for us to define a default value that will work for all themes or even most of them.
We need to add compatibility for each theme separately as we discover which ID is used for them. That is one reason why the feature to use the site’s header is marked as “Experimental”.
We can’t possibly test all existing themes free and paid and add compatibility for all of them in advance.
Changing the header element ID used to position the order summary and progress bar #
To fix this issue you’ll need to add a customization code to your website, changing the ID used for positioning the order summary and progress bar.
The code snippet needed is slightly different for the checkout page and cart page.
Checkout page #
The code used to fix the order summary and the progress bar are pretty similar. You only need to replace the value of the attribute data-sticky-relative-to to match the ID of your theme’s header. In this case, for the Divi theme the header element ID is #main-header.
/**
 * Change the sticky relative element for sticky elements on the checkout page.
 */
function fluidcheckout_change_sticky_elements_relative_header( $attributes ) {
	// Bail if using the plugin's header and footer
	if ( FluidCheckout_Steps::instance()->get_hide_site_header_footer_at_checkout() ) { return $attributes; }

	$attributes['data-sticky-relative-to'] = '#main-header';

	return $attributes;
}
add_filter( 'fc_checkout_progress_bar_attributes', 'fluidcheckout_change_sticky_elements_relative_header', 30 );
add_filter( 'fc_checkout_sidebar_attributes', 'fluidcheckout_change_sticky_elements_relative_header', 30 );
Remember to replace the value of the attribute data-sticky-relative-to at LINE 8 of this code snippet. See below how to find the correct ID for your theme.
If you are unsure about how to add the code snippet to your website, check our article:
How to safely add code snippets to your WooCommerce website
Cart page (PRO Feature) #
If you are using the Cart Optimization feature from the Fluid Checkout PRO plugin, you’ll need to use a slightly different code snippet to fix this issue on the cart page:
/**
 * Change the sticky relative element for sticky elements on the cart page.
 */
function fluidcheckout_change_sticky_elements_relative_header_cart( $attributes ) {
	// Bail if using the plugin's header and footer
	if ( ! class_exists( 'FluidCheckout_PRO_CartPage' ) || FluidCheckout_PRO_CartPage::instance()->get_hide_site_header_footer_at_cart() ) { return $attributes; }

	$attributes['data-sticky-relative-to'] = '#main-header';

	return $attributes;
}
add_filter( 'fc_pro_cart_sidebar_attributes', 'fluidcheckout_change_sticky_elements_relative_header_cart', 30 );
Remember to replace the value of the attribute `data-sticky-relative-to` at LINE 8 of this code snippet.
See below how to find the correct ID for your theme.
If you are unsure about how to add the code snippet to your website, check our article:
How to safely add code snippets to your WooCommerce website
Finding the ID of my theme fixed header element #
To find out what is the correct ID to use for your theme, follow the steps below:
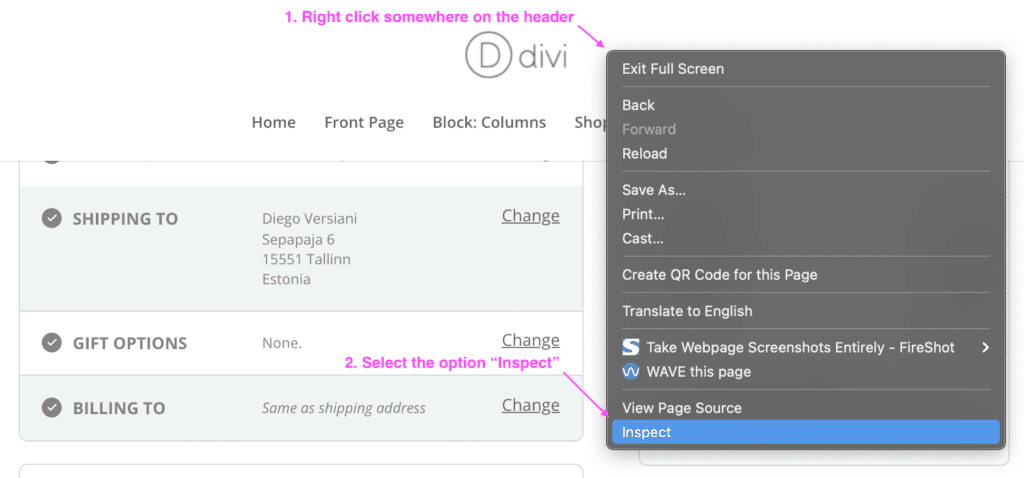
1. Right-click any part of the site’s header.

2. Select the option “Inspect”, this will open the browser developer tools at the “Elements” tab.
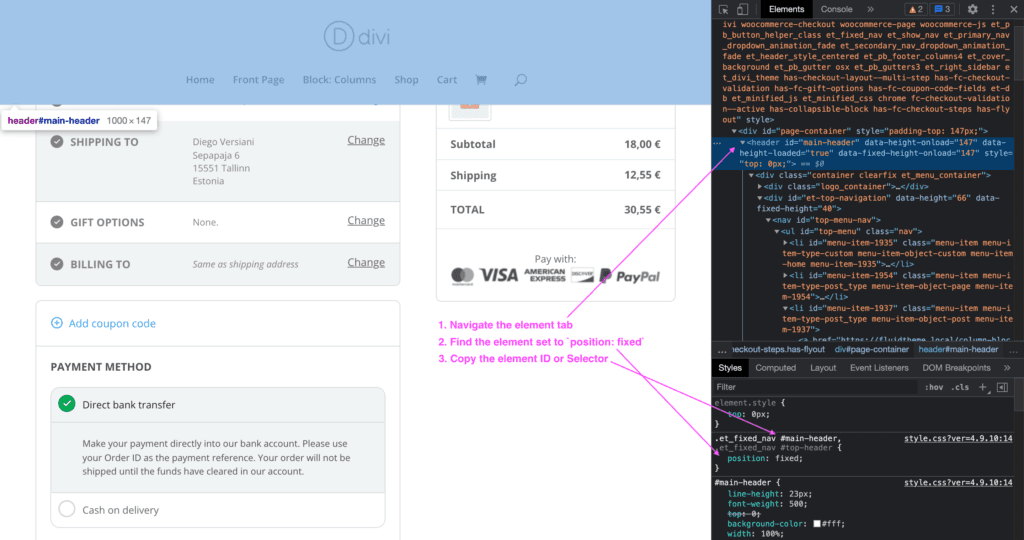
3. Navigate the “Elements” tab, usually up in the elements hierarchy.
4. Find the element which is set to position: fixed, select one item in the “Elements” tab, and look in the “Styles” tab if the element has the CSS property position: fixed.
5. Copy the element ID to use as the data-sticky-relative-to on the code snippet above. It is preferable to use only the ID of the element (ie. #main-header), although a valid CSS selector is also accepted in case the element does not have an ID (ie. .et_fixed_nav .main-header).

6. Paste the copied ID or CSS selector in the code snippet, replacing the existing value for the attribute data-sticky-relative-to.
